Many thanks to Aaron Clark for this great visual guide to packing the haversack. Open the gallery to see larger pictures and a description of what is happening in each step.
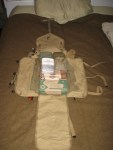
Below the soap tin, I’ve placed some G.I. toilet paper — one with a pair of period scissors, for emergency or mundane handiness. If you have them or similar, I’d recommend adding in hygiene items like toothbrush, tooth powder, and shaving kit.
Now that we have our contents packed away neatly, it’s time to close up the haversack. First, you’ll want to take the bottom flap and pull it up to the top as much as you can.
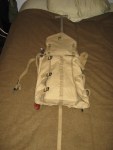
Now you’ll want to fold up the side flaps.
Now for the straps: Run the three side flap straps through the web keepers on the bottom flap.
Here’s where we’ll deviate from the field manual. Many G.I.s — if not most — chose to run the bottom side flap strap around the entrenching tool to stabilize it from swinging around on the move. This is where the deviation comes in: Rather than fastening all three straps at once, fasten only the top two straps through the friction buckles and pass them through the web keepers, leaving the bottom strap for later.
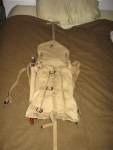
This step is a personal preference of mine, which is to tuck the straps back through the web keeper below each strap, to keep them neat and out of the way. This is definitely not a necessary step
Now for the main, top flap: Take the bottom-most strap that comes from the very bottom of the haversack and buckle it through the friction buckle on the inside of the main flap. Snug the strap up nicely.
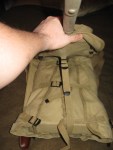
Now the entrenching tool is laying down on top of everything. Take that lone, bottom side flap strap, run it around the entrenching tool once, and buckle it. Now you’re done! Your haversack should now look roughly like this.


This looks very useful, I just ordered an M1928 for a Philippine Scout field artillery uniform I’m putting together, so thanks for putting it up!
LikeLike